Monday, November 26, 2012

Pappardelle with Watercress Pesto and Zucchini


This recipe was originally created for Urban Harvest, do go check out their website for some great produce and other recipe ideas.


Pesto is a great way of using up a glut of of herbs you happen to have, it will extend the shelf life, and give you a quick and easy meal or jazz up a salad dressing or sandwich. It takes its name from the same root that pestle comes from and is traditionally made with one, although a food processor these days is a little easier. When using a machine care should be taken as the more you break down the leaves the greater the oxidation will be, so coarse chopped will taste fresher and more like the herb you expect. With that in mind it doesn’t hurt to put in a little preparation before the convenient machinery, this is as simple as making a paste of the garlic with the back of a knife or fine microplane, grind the nuts before you add the herbs, and have the lemon juice ready to add to help halt the oxidation.

The obvious partner to pesto is of course pasta, and although you may think homemade is hard work, I assure you it is not complicated or too time consuming. Two parts egg to three parts flour by weight, standard flour is fine, but you can use durum if you prefer just take into account that different flours absorb varying amounts of liquid so adjustments will have to be made. The minimum weight (NZ)* for size 6 is 53g, 7 is 62g, and 8 is 68g, so a rough calculation can be made by how many and what size eggs you use, however I recommend using digital scales, but if not, err on the side of less flour and add extra as needed.


Watercress and Basil Pesto
2 cups Watercress (packed), 100g
½ cup Basil (packed), 25g
½ cup Olive oil
½ cup Pine Nuts, 70g
½ New Zealand Shaved Parmesan, 40g
1 Large lemon, juiced
1 small clove garlic (optional)
Salt and pepper to taste

  • Toast the pine nuts and pulse in the food processor to roughly chop, set aside.
  • With the back of knife crush and make a paste out of the garlic, or grate it.
  • Pack the watercress and basil into the food processor with the lemon juice, olive oil and garlic, pulse until roughly chopped.
  • Add the pine nuts and parmesan, pulse until a rough paste has been formed.
  • Taste and adjust the seasoning with salt and pepper, you may need to add a little more lemon juice, or a little more oil to loosen it.
  • Transfer to a container with a lid and let it rest in the fridge so the flavours can develop, I like to leave it at least an hour before using it. It will keep about a week in the fridge, if it’s not eaten first.


Pasta (Pappardelle)
(2 large servings)
2 Eggs, Size 8 (70g each approx)
210g Flour (1 and 2/3 cups very approx)

  • Pour the flour into a bowl and make a well in the center.
  • Break the eggs into the well and using a spoon start working the eggs into the flour using a circular motion working from the inside out.
  • When a dough begins to form use the heel of your palm to knead it together picking up any loose crumbs and working it to a relatively smooth dough.
  • Securely wrap the dough in cling film and let it rest in the fridge for at least 30 minutes, it’s important to let the dough rest as it gives the flour a chance to hydrate.
  • Divide the dough in two.
  • Dust the bench with flour, I like to use a mixture of fine semolina and normal flour to dust with when rolling out the pasta, the semolina gives a nice texture to the final product, something for the sauce to hold on to.
  • Roll the dough out into a rectangle and then fold the bottom third up and the top third down, rotate the dough 90 degrees and repeat. Folding ensures you get a nice bite from your pasta.
  • When you’ve rolled the dough thin enough to get through the thickest setting on your pasta machine start using that to roll the dough.
  • Run it through each setting a couple of times until you get down to number four, dusting it with flour as you go to prevent sticking.
  • Take the long rolled out sheet of pasta and give each side a good dusting then roll it up gently, so you end up with a log of pasta, carefully cut 2cm slices, don’t apply too much downward pressure.
  • Uncurl the pasta ribbons, dust lightly with flour and set aside. Repeat with the other half of the dough.


Putting it all together
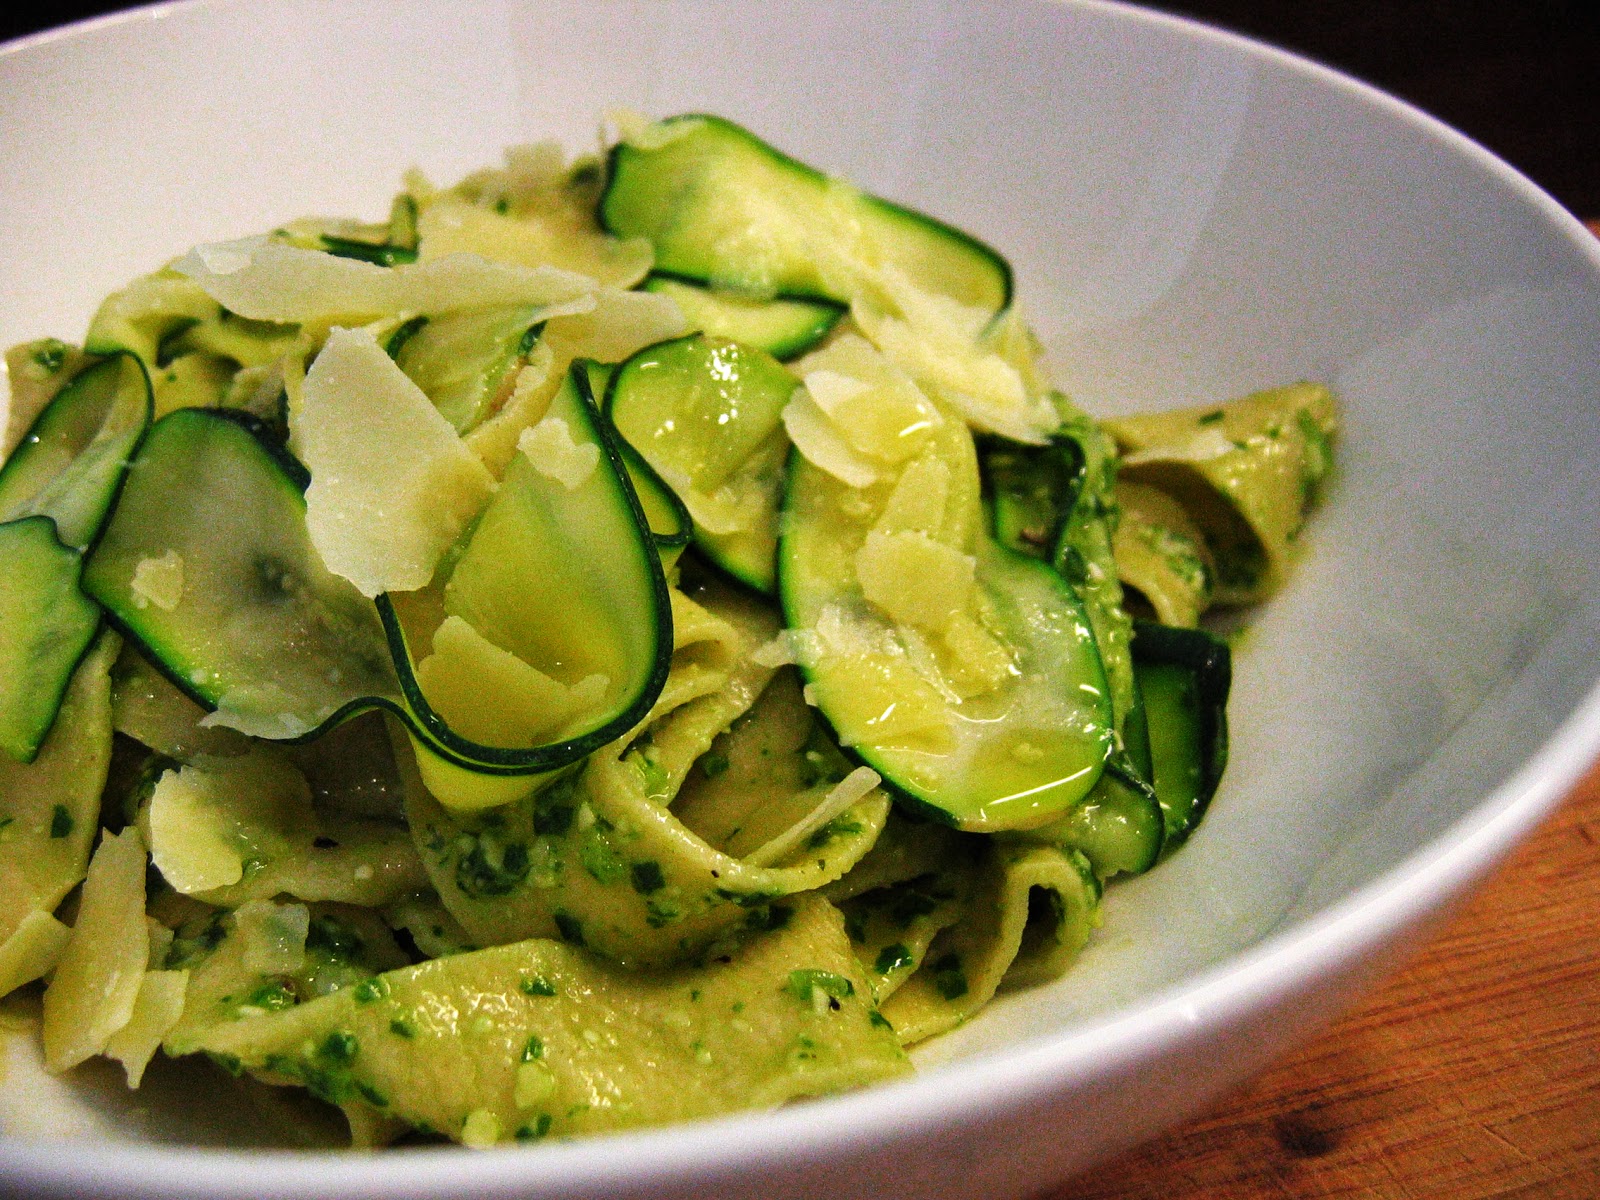
  • Get a large pot of generously salted water onto boil, when a rolling boil starts add the pasta and cook for 2-3 minutes.
  • Cut the zucchini into ribbons with either a mandoline on the finest setting, or use a vegetable peeler. Sprinkle over some salt and then sauté quickly in a hot pan, just wilting the ribbons rather than cooking all the way through.
  • Toss the cooked pasta with a generous spoonful of pesto and the cooked zucchini, serve in a large bowl with flakes of parmesan, finished with an indulgent drizzle of good olive oil.
* http://www.teara.govt.nz/en/poultry-industry/4

Sunday, November 18, 2012

Beer


I’ve been meaning to get into this beer brewing thing for quite a while, but always seem to put off getting the required kit, and the lack of a decent brew store in Wellington hasn’t helped much. But we now have The Brew House in Newtown a great little brew supply shop, determined to change the procrastination habit I made my way from Karori to Newtown and bought myself a starter kit, I figured if I started off with a beer for dummies kit it would be foolproof and build up a bit of brewers confidence setting me off to try more advanced brewing techniques.

I followed the instructions and all was going well until I started thinking about what my next brew could be, I found many homebrew forums, and they left me with severe doubts about the supplied kit instructions, there are so many pages and posts online about just how bad kit instructions are, which led me to throwing away the supplied instruction sheet, which advised the beer would be ready to bottle in 5–7 days, and ready to drink in a couple of weeks, I ended up brewing the beer in the fermenter for a total of 23 days, the last half the Gravity had been stable, but the flavours weren’t they were developing mellowing becoming something a lot more pleasant than what they were on day 7.


I finally got the brew in the bottle, possibly the most tedious thing in the world washing and sterilising 30 bottles, I still have 2 weeks before I can chuck a couple of bottles in the fridge to have a taste, and realistically I’m not expecting to really start drinking it for another 3 weeks (four in total).


Much research and thought has gone into the next brew, I was fortunate to find a The Brewers Friend website which has a recipe calculator, you put in what style of beer you want to make, and then the grains, malt, hops and it will tell you how far off the style you are. I’ve decided on making an APA (American pale ale), a not too strong (6%) hoppy ale. I’ve also decided to up technical difficulty, I’m going to do a partial mash, which is steeping milled grains in hot water (about 65ºC) converting the starch in the grain to fermentable sugars through an enzymatic reaction, I had contemplated doing a full mash but as it is my first go and I don’t know how successful or what at efficiency I’ll be converting starch to sugar1, I’m also adding a dry or liquid malt extract to cover my arse a bit.


The batch after that, I’m not sure yet, the other half wants to try cider so that could be a goer, I’m already contemplating getting another fermenter barrel so I can do a secondary fermentation of the APA with hops, which will add a nice floral aroma and also help clarify the beer more. All going to plan once the first batch is ready to drink I should be brewing enough to keep us stocked up with beer and never have to buy it again, not that I won't, there are too many good artisan brewers in Wellington and too many good bars serving them on tap, I’m looking at you Hop Garden and Fork & Brewer.


1. I managed to get 60% conversion of starch

Sunday, November 11, 2012

Ricotta 'ravioli'


I mentioned that I’d post about this seamless ‘ravioli’ back when I wrote about the egg yolk ravioli, the method is pretty much the same but with ricotta cheese, and a little more care has to be taken when boiling to avoid the balls collapsing.


I opted for traditional flavours, a good pile of ricotta, lemon rind finely grated in, along with some nutmeg and a good sprinkle of salt, mix together well. Using a tablespoon scoop out even sized portions and roll into balls with damp hands. The balls are then placed on a bed of fine semolina flour (or use durum) and then covered with a layer of the flour. Refrigerate for a couple of days to let the flour hydrate forming a casing around the cheese filling.


Gently shake off the excess flour and cook in salted boiling water for a minute or two, keep a close eye on them looking for signs that they might collapse, it’s unlikely but better safe than sorry.


You could serve them nice and simple, maybe with brown butter and sage, but I had a meaty, spicy, dosed with extra anchovies and capers sauce on hand.

Monday, November 5, 2012

Twice cooked roast pork belly


There are dishes which you wish had a quick and easy version, or at least a way of getting the benefits of a long cook in a short time. Pork belly is one of those roasts that easily falls into that category, you want unctuous fall apart flesh and crisp salty crackling. There are a lot of shortcut methods that purport to achieve this miracle, but I have yet to find a one that doesn’t compromise some aspect of what should be a rather tasty bit of meat. As with anything worth doing, it should be done right, with a little forethought and planning you can spend a relatively short active time cooking to achieve perfect roasted pork belly.


Set your oven to 120–130ºC. Place the pork belly in an ovenproof dish, add herbs and some liquid, thyme and cider’s always nice, or a few juniper berries and bay leaves. Don't forget to season the meat. Cover the dish with a snug layer of tin foil. Cook for about 5 hours.


When time is up carefully remove the pork from the dish and set aside to rest. Get two dishes (I use a couple of rectangular oven dishes), ideally one will be slightly smaller, line the base with a piece of baking paper, place the pork in the dish and lay another piece of baking paper on the pork and then put the other dish on top, press down gently, you could weigh it down with some cans but I find wrapping it tightly in clingfilm does the trick and takes up less room in the fridge. Refrigerate overnight.


Ready to devour some porky goodness? Well not long now. Set the oven to 220ºC, I just crank mine up to full. Remove the pork from the fridge, score the skin side, portion it and season the skin side with salt. Get an ovenproof pan on a hot heat, and when almost smoking, place pork in the pan, skin side down. Put the pan in the oven and cook for 15–20 minutes.


That’s about it, get it from the oven, don’t forget that pan handle is going to be hot! Transfer the pork a board, skin side up, let it rest for 5 minutes or so, and then greedily eat it all up. All and all, some delicious roasted pork belly took you 10–15 minutes of active cooking, and a whole lot of waiting, but I think you’ll agree it’s worth the wait.