Tuesday, December 16, 2014

Smoked mackerel potato salad


Not much beats a nice new potato gently cooked until tender dressed in a little vinaigrette, well that was until I decided to put a Christmas dinner idea to the test, well half an idea anyway. I plan on spit-roasting a rolled pork belly on the day, I’ve ordered a nice 4-5 kg piece, and I figured that there would be a decent amount of fat rendering out so I should just shove a tray of potatoes under it to catch the fall off and roast away at the same time, which got me thinking about cooking in fat and how chips cooked in dripping are far superior to any of those canola/soy/peanut fried things.


I set about with a bunch of new potatoes, a few tubs of dripping and a good stalk of rosemary. In a cast iron dish dripping got melted down with the fragrant rosemary and when finally liquid, the potatoes submerged. Then the dish was covered and placed in a low oven for a couple of hours until the potatoes were tender, the house was filled with beautiful roast beef aromas. I let the lot cool before transferring to the fridge to set up, well not before testing one of course.


The next day I spied probably one of my favourite ingredients at the local shops, smoked mackerel, and with the potatoes sitting in the fridge and it being a balmy 30ºC I figured a nice light salad was the best option. Potatoes gently encouraged out of their fatty tomb and split lengthwise, placed cut side down in a hot cast iron pan to become crisp and golden, flipped over and sprinkled with salt then set aside on some paper towels. Medium eggs placed in cold water, brought to the boil, then 3 minutes of bubbling before being dunked into ice water. Mackerel flaked. Celery sliced on a heavy bias. Tomatoes quartered and seeded. Capers rinsed. Parsley picked over. Red onion diced. A fifty-fifty vinaigrette made, 1 part olive oil, 1 part cider vinegar, dijon mustard and a dash of salt. The potatoes now just a little warm, arranged on a plate with generous amounts of the flaked fish scattered about, the vegetables evenly deposited, topped with an egg cut in twain, garnished with a generous scattering of parsley and capers, finally healthily dressed with the vinaigrette.

Wednesday, December 10, 2014

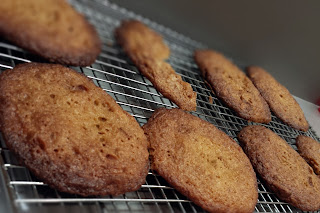
Cereal cookies


I may of tested one of these before taking the photo.

Cereal cookies
8 portions

100 g Butter
130 g Brown sugar
20 g Glucose syrup
1 Egg
100 g Flour
75 g Cereal
Pinch of Salt
1 tsp Baking powder
1 tsp Baking soda
1 tsp vanilla paste
  • Cream butter and sugar.
  • Beat in egg.
  • Mix in vanilla and glucose.
  • Sieve in flour, salt, baking powder and baking soda.
  • Mix together with cereal.
  • Portion out and place on lined tray several inches apart, you’ll probably need two sheet pans.
  • Refrigerate for at least an hour.
  • Preheat the oven to 190ºC.
  • Cook for 14–18 minutes.
  • Allow to cool on the pan before transferring to a cooling rack.
  • Will store for several days in an airtight container, or alternatively store in a zip-lock bag in the freezer, they can be eaten straight from the chiller.

Thursday, December 4, 2014

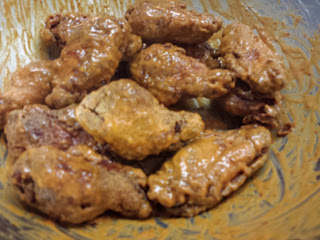
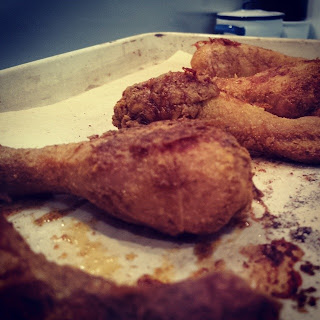
Extra hot chicken


For a long time I had avoided deep fried foods, much for the same unguided reason I avoided the fat in food, I was brainwashed to believe fat in means fat on, not the reality that it’s just a source of calories no different from the other calories going in, maybe a bit more dense in calories and possibly not as nutritional. I also had the impression that fried food equal greasy fatty food, this maybe true for things such as french fries which can be a whopping 50% fat by weight and food cooked incorrectly, but not at all the case for foods cooked at the correct temperature. The other main reason for the avoidance, or at least at home, has always been the smell, but get a thermometer, a heavy based pan, don’t overcrowd it, and that shouldn’t be a problem either, heck even the crappy domestic extraction system should be enough to deal with it.

So, deep fried chicken, getting thoughts of poorly cooked greasy fast food? Well, don’t, think crisp, crunchy, steaming hot, not at all greasy, fiery hot spicy goodness that will leave you red in the face and dripping with sweat.

3 Chicken legs, portioned to thigh and drum
Canola oil


Brine
All percentages are by weight (eg. 1000 ml water, 50 grams salt)
Water
5% Salt
2.5% Cayenne powder
1.5% Garlic powder
1.5% Onion powder
2.5% Chilli flakes
0.5% Hot sauce
0.5% Morita Chilli

Heat the water in a pan and dissolve the salt, add all the other ingredients and cover, let it cool to room temperature. Place a large zip lock bag in a bowl and add the chicken, pour in the brine and remove as much air as possible while sealing the bag. Place in the fridge for 12–24 hours.


Dredge
Flour
Salt
Cayenne Pepper*
Chilli Flakes*
*The more you add the hotter it’ll be, so add heaps!

Remove the chicken from the brine and pat dry, toss in the dredge, shake off excess flour and place on a tray with a rack on it. Refrigerate for an hour, uncovered. Do not dispose of the remaining dredge yet.

Egg Wash
1 part Egg
2 parts Water
Salt


Cooking
  • Remove the chicken from the fridge and let sit at room temperature for about 30 minutes.
  • Heat several inches of oil in a heavy based cast iron pot to 190ºC.
  • Dip the chicken pieces in the egg wash, shake off any excess, toss in the dredge again, and shake off any excess flour.
  • Cook the chicken in batches, carefully laying the chicken away from you in the oil, cook until the internal temp reaches 65-70ºC (depending on how paranoid you are, the temp will rise at least 5ºC while resting).
  • Remove the pieces to a rack, not paper towels, to drain and rest while you cook the remaining chicken.

Serve with some sour pickles and lashings of hot sauce (if you can take the heat).

Bonus, oven baked extra hot wings


Brine
Water
5% salt
Chilli flakes*
Cayenne pepper*
*As much as you can handle, more the better I say.

As above, place wings in cooled brine in zip lock bag and refrigerate for 12–24 hours.

Dredge
2 parts flour
1 part fine semolina
smoked paprika
cayenne

  • Mix all the ingredients together in a bowl. 
  • Shake excess brine off the chicken and place in the bowl. 
  • Cover tightly with a couple layers of cling film and shake (you could do this in a bag), make sure the chicken is evenly coated. 
  • Place chicken on a rack set over a sheet pan and refrigerate uncovered for at least an hour. 
  • Use a spritzer to coat the chicken in a fine film of olive oil, or gentle toss the chicken in a bowl with a little oil (take care not to dislodge too much coating). 
  • Use a sieve with some fine semolina to put a light coating on both sides of the chicken. 
  • Cook in a preheated 230ºC oven for 40–60 minutes, turning every 20 minutes. 
  • Add lashings of habanero hot sauce and devour.

Friday, November 21, 2014

A couple of toasted pastas


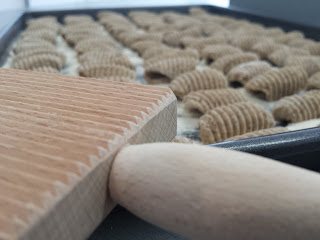
I’ve been a on a bit of a pasta buzz recently having recently received Flour+Water in the mail, the kitchen draws have become a bit more stuffed, a gnocchi board, different lengths of dowel, cavatelli machine, pasta roller (I finally replaced the hell beast that shredded my hands), fluted cutter, a new hand cranked pasta extruder too, all essential tools, well that's what I tell the wife. I’ve really enjoyed being introduced to a decent recipe for semolina pasta dough, I can now whip up a batch of orecchiette or cavatelli in no time flat, there’s something cathartic about working your way through a batch of dough rolling it down the ridges of a gnocchi board with your thumb or scraping little dough pieces with a bread knife and turning inside out over your thumb to make orecchiette.

The catalyst for the addition of many length of dowel to the kitchen supplies was the purchase of the gnocchi board and coming across the recipe for garganelli, it was rather fortuitous that the day after reading the recipe we happened to be in the vicinity of a hardware store with the ideas of purchasing some home improvement bits and bobs, many a dowel was bought and childish excitement about making pasta ensued, I mean I pester my other half with “Have you seen the pasta, it’s so cool!”, “Yeah I saw it on instagram”, “Well you haven’t seen it person!!!” I say as I grab the tray of dried pasta and shove it in her general vicinity “Cool huh”. It’s probably quite worrying I get so excited over the perfectly formed cavatelli rolling off the board, or that I’ve figured out a better way to roll, it is probably the reason I instagram so much.

By the way, if you want a really decent cast iron pan for not very much, like less than half of what a certain person is selling them for, Mitre 10 and Moore Wilson's stock Lodge pans, as I found out after I imported mine from the US, thankfully for about the same price.

The garganelli was inspired from Flour+Water, farro was used in the original, I was fresh out so opted for rye and it turned out excellent. The second pasta, cavatelli is my adaptation of the semolina dough used for orecchiette with the addition of roasted rye.


Roasted Rye Flour
Roast rye berries in a dry pan until deep brown and almost smoking, be careful not to burn. Transfer to a bowl and once cool grind in a spice grinder.


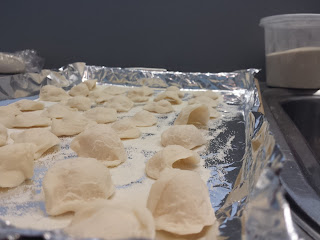
Garganelli served with crispy chicken thigh confit and garden vegetables.

Roasted Rye Garganelli
90 g Toasted Rye Flour
300 g Egg yolk
270 g Flour (00 if you have it)
Place the dry ingredients in a large bowl and make a well in the centre. Tip in the egg yolks and slowly work the flour in. Once a dough ball has formed tip out on the bench and knead for about 8 minutes, until the dough is smooth. Cover tightly in cling film and let it rest for 30 minutes, if you’re not going to roll the pasta in half an hour, refrigerate.

Take quarter of the dough, keep the remainder covered, and run through a pasta machine until you reach the thinnest setting (1.5mm). Use a ruler or straight edge and roller cutter to slice the rolled dough into squares (about 3 cm squared).


Place a square diagonally on a gnocchi board so a point is at the top (closest to you), place a dowel (5~8 mm diameter) just below this top point and bring it up over the dowel. Roll the dowel down the board, use a bit of pressure so the dough sticks to itself but not so much the grooves cut the pasta. Place the completed garganelli on a sheet pan sprinkled with semolina.

Leave to dry at room temperature until you’re ready to cook. Cook in boiling salted water for 2–3 minutes.


Served with Pumpkin seed pesto, asparagus, celery-parsley salad and malt pickled red onion.

Roasted Rye Cavatelli
50 g Toasted Rye Flour
180 g Semolina
130 g Flour
178 g Salted water (168 g Warm water with 10 g Salt Dissolved in it)

Place the dry ingredients in a large bowl and make a well in the centre. Pour in the water and slowly work the flour in. Once a dough ball has formed tip out on the bench and knead for about 8 minutes, until the dough is smooth. Cover tightly in cling film and let it rest for 30 minutes, if you’re not going to roll the pasta in half an hour, refrigerate.

Cut off about quarter of the dough, cover the remainder. Using your hands roll out into a thin log, about a pencil width thick. Cut into 1cm segments. Hold the gnocchi board in one hand at an angle and place a piece on the top edge. Use the heel of your thumb push down on the dough and towards the bottom edge of the board, the dough should curl up and fall of the board.

Pumpkin Seed Pesto
Lemon, juice and rind
Garlic, puréed
Pumpkin Seeds, roasted and ground
Olive oil
Salt

Wednesday, November 12, 2014

Yes, yes, wings again


I like having a little decompression time when I get back from holiday before I head back to work, so coming back from Melbourne to a long weekend at home is perfect. I had a batch of Saison to bottle and another batch ready to brew, a hoppy little pale ale, and gives me a chance to get out of holiday mode. I'm not one usually to eat 3 square a day at home, but on holiday I always seem to manage breakfast lunch and dinner, and with the choices available it's hard to resist! Town mouse was definitely a highlight, the food is so crazy good it's hard to put into words, but if you're ever there I and it's still on the menu I highly recommend the fermented veal tartare. The bbq on the last day was also memorable, but then sitting out in the 33°C sun with a cold beer and a tray full of collard greens, pulled pork and brisket is hard to surpass. I could probably go on and on, as it feels like all we did was drink, eat and move on to the next place, with what we managed to put away at Chin Chin I'm surprised we haven't come back several sizes larger. It was also great to get out of the city and into Yarra valley, I got quite touristy and bought a t-shirt from White Rabbit brewery, Little creatures sister which is a must get to in the city also, any way I should stop before I rabbit on for too long.


This is a pretty simple throw together, well it helps if you can sort the wings the day before as this does result in a superior crust. In a bowl toss together chicken wings, semolina flour, cumin, coriander, paprika and chilli powder. Cover and refrigerate, toss now and then to make sure the wings are fully coated. The next day, preheat the oven to 220°C, line a tray with baking paper, sprinkle in some fresh semolina flour on the chicken and toss, arrange on the tray and cook for 20 minutes, turn and cook for a further 20. Remove from the oven and toss through some hot sauce (even better hot sauce and melted butter) and serve with a crisp slaw.


I prepared some chipotle mayo to toss the wings through, this is an eggless version as can't serve raw eggs at home at the mo, take 4 chipotle in adobo sauce and place in a jar that can fit an immersion blender, add about 1/4 of a cup of peanut oil and about the same of cider vinegar, blend together and adjust the salt. Sprinkle in about 1/4 of a tsp of locust bean gum and xanthan gum, blend for about 1 minute, until the dressing has emulsified, adjust the amount of xanthan gum to thicken the "mayo" but don't go too crazy with it as it will become snotty.

Monday, November 3, 2014

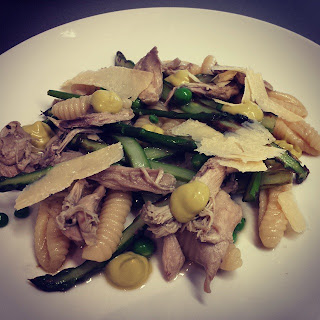
Cavatelli with poached chicken


As one does, I spend a bit of down time trawling through ebay seeing what bargains can be had, and quite often have to forcefully tell myself that no I do not need vintage Mello Yello crown caps, even if my home brew bottles would look awesome, but every now and then I just can't help myself, especially when it’s a gnocchi board for less that $5 and free shipping, it’s a must purchase if you want to hand roll cavatelli, which ever since the machines purchase I have wanted to have a go on a proper wooden gnocchi board. Well, order placed, I had hopes that it’d turn up before I left on holiday, in fact I had a few packages I hoped wouldn’t be sitting on the doorstep for a week while I was away, maybe I have an online shopping problem.


Cavatelli
180g flour
180g fine semolina
168g warm water
10g salt

  • Dissolve salt in water.
  • Mix flour and semolina together.
  • Form a well and pour in water.
  • Mix together and knead for 10 minutes.
  • Cover tightly with cling film and rest at room temp for 30min.
  • Cut off about quarter of the dough, cover the remainder.
  • Using your hands roll out into a thin log, about a pencil width thick.
  • Cut into 1cm segments.
  • Place a piece on the top edge of a gnocchi board
  • Push down with your index finger across the board and drag with pressure towards the bottom, it should curl over itself. (Kind of like stroking the length of the board with the flat of your index finger with some pressure)

Chicken poached in stock with peas, thyme, pulled apart.

Peas from the poaching liquid passed through a mouli to purée and remove the skins, then with an immersion blender, olive oil and cider vinegar are emulsified into the purée. Seasoned with a little Dijon mustard, salt and pepper. Transferred to a little piping cone made from parchment paper.

The poaching liquid is topped up with enough water to boil the cavatelli, cook for 5 minutes.

Asparagus sliced in half, sautéed in pan then finished with pasta stock to poach. Fresh garden peas tossed in at the last second to warm through.

The pasta is tossed with some of the cooking liquid, chicken, fresh peas, asparagus and olive oil, seasoned, arranged on a plate, the pea “mayo” piped on, and finished with a little grated parmesan.

Sunday, October 19, 2014

Orecchiette


I’ve been quite excited about getting the Flour+Water cookbook, I even pre-ordered it, something I don’t do that often, the book is beautifully put together, full of stunning photographs, and very well written with easy to follow recipes. Their instagram feed is a must follow. The Orecchiette below is from the book (not verbatim) and the sauce my own, more of a I really really want to make Orecchiette, get another pasta method under my belt, and I have leftover roast chicken thighs that were going to become a rye berry salad but transitioned quite easily to a nice stocky sauce.

Sauce
Leftover chicken meat shredded, thighs and drum
1/2 carrot very finely diced
1/2 red onion finely diced
2 cloves garlic, minced
2 tbsp parsley and oregano, finely diced
1 cup chicken stock, infused with thyme and chilli
1 tsp cider vinegar
Chard, leaves finely sliced and stalks finely diced
1 tbsp butter
75~100 ml pasta water
Parmesan cheese
Salt and pepper
Olive oil

Sauté chicken until crisp and golden around the edges, toss in the carrot, onion and chard stalks, cook until translucent, add the garlic and deglaze with cider vinegar. Add the chard leaves and chicken stock, simmer until reduced by half. Put the pasta onto cook, and after about a minute add a ladleful of the pasta cooking water and swirl in the butter, don't stir. Taste and season.1 minute later (2 minutes total) add the 80% cooked pasta and toss, finish cooking it in the sauce. Stir in the herbs, cook for 30 seconds more. Double check seasoning. Serve up with shavings of parmesan.


Orecchiette
180g flour
180g fine semolina
168g warm water
10g salt


  • Dissolve salt in water.
  • Mix flour and semolina together.
  • Form a well and pour in water.
  • Mix together and knead for 10 minutes.
  • Cover tightly with cling film and rest at room temp for 30min.
  • Cut off about quarter of the dough, cover the remainder.
  • Using your hands roll out into a thin log, about a pencil width thick.
  • Cut into 1cm segments.
  • Use a butter knife and push down on the far edge of a piece and pull towards yourself, so the dough curls over.
  • Uncurl over your thumb and turn inside out to form a dome.
  • Place completed Orecchiette on a sheet pan dusted with semolina.
  • Leave to air dry at room temp until you’re ready to cook.
  • Boil in well salted water for about 2 minutes, and then another minute in the above sauce.

Wednesday, October 8, 2014

Ricotta Cavatelli


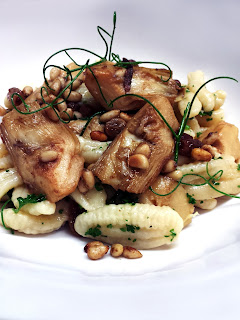
I’m becoming quite addicted to the Google Keep App, it’s a large tile of post-it like notes or lists that you can access via a web page or phone/tablet app. I find it handy for jotting down ingredients or ideas, partial and full, and the obvious shopping lists and being able to tick off as you go. This started out as one of those little post-its, “artichokes, pine-nuts and sultanas”, I had that down and wanted to do something with it. I happened to have a tub of Zany Zeus ricotta in the fridge and a desire to revisit cavatelli, so again much consternation about finding some consistency across recipes for ricotta cavatelli I ended up forming what I thought would be a good ratio and set to work.

I did happen to mention the cavatelli accompaniments to my other half, and much like any savoury with a fruit addition her nose screwed up and indignantly told me in no uncertain words that she would not be having that for dinner, so she got a garlic-bacon-tomato sauce that was whipped up.


Ricotta Cavatelli
200g Flour
200g Ricotta
1 egg
5g salt
  • Mix the flour and salt together and form a well.
  • Add the ricotta and egg.
  • Use the back of a fork to mash the egg and ricotta together, slowly working into the flour.
  • Use your hands and form into a ball.
  • Knead for about 5 minutes, until nice and smooth.
  • Wrap in cling-film and refrigerate for half an hour.
  • Roll out the dough on a well floured bench and cut into strips ready for the cavatelli machine.
  • I floured the machine, and on top of the roller so a bit of flour gets sprinkled over the dough with each turn.
  • Pinch the dough and run through the machine.
  • Toss in flour to keep the cavatelli separated until you’re ready to cook.
  • Shake off any excess flour and cook in well salted boiling water for 3–5 minutes.

For the pictured dish:
  • Soak sultanas in a hot liquid
  • Toast pine-nuts
  • Quarter cooked artichoke hearts
  • Pick some pea-shoots
  • Zest and juice lemon
  • Finely chop some parsley, dill would be nice too
  • Sauté the artichokes in a little olive oil and butter until they begin to caramelize.
  • Toss in the lemon zest, sultanas and pine-nuts.
  • Stir in some butter and toss through.
  • Taste and season with lemon juice and salt (I’m totally obsessed with smoked salt at the moment).
  • Add the parsley and cooked cavatelli, toss together.
  • Dish up and garnish with the pea-sprouts.


Bacon-tomato sauce
2 rashers of bacon
1 can of good tomatoes
1 onion
3 big garlic cloves
cider vinegar
salt
chilli flakes

In a pot over a medium heat, sauté the chopped onion and whole garlic cloves, when soft add the chopped bacon, cook until the bacon has rendered most of the fat but not coloured too much, add a splash of cider vinegar, add the tomatoes and a pinch of chilli, cover and turn the heat down, cook for about 20 minutes. The onions and garlic should be very soft, purée the sauce with a stick blender, taste and season with salt and adjust the acidity with vinegar. Simmer until the desired consistency is reached. Toss cooked cavatelli through the sauce.

Tuesday, September 30, 2014

Cookies


We’re not ones to keep ice-creams, cookies, cakes, biscuits and other sweet treats in the house, usually they’re bought with the intention of immediate consumption, and even if we did, I doubt they’d last. So when that sweet tooth craving happens upon me there’s usually nothing at hand, apart from the occasional candy, so I have a couple of go to recipes for a quick and easy sugary treats, cookies and fruit sponge are main culprits. I especially like the cookie solution as I can make up a batch and have a cling-wrapped log of dough in the freezer ready to slice off a few cookies to bake, rather than have a big batch of pre-cooked cookies, knowing my will power the entire batch would get demolished rather than enjoying one or two.

Cookies
300 g Flour
200 g Butter
100 g Sugar
6 g Salt
  • Cream the butter, sugar and salt together. 
  • Mix in the flour. 
  • Roll into a log shape using cling-film. 
  • Refrigerate for half an hour. 
  • Slice discs, thin or thick, up to you, arrange on a sheet pan.
  •  Bake at 180ºC for 10 minutes or so, depending on thickness.


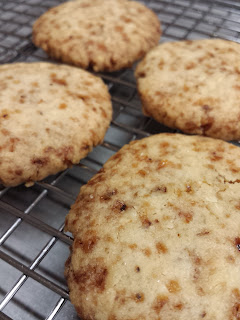
Well that’s the basic cookie recipe, this latest batch I took about 100 grams of “burnt” hazelnut praline I had made a few weeks early and blitzed it until I had a good mixture of powder and chunks and combined that with the dough base. I also sprinkled the sliced cookies with some smoked salt before baking them.

Wednesday, September 24, 2014

Ramen


Alkaline noodles

400g Flour
200ml Water
12 g Baked Soda*
  • Dissolve the Baked soda in half the water (warm) then add the other half (cold). 
  • Add the flour and knead for 5 minutes, it’s tough work rather like kneading a brick. 
  • Wrap in cling-film, leave for 20 minutes at room temp. 
  • Knead for another 5 minutes, it’s a little less brick like but still damn hard work. 
  • Re-wrap and place in the fridge for at least an hour. 
  • Cut into 5 portions and run through a pasta machine getting it down to the 2nd thinnest setting.
  • Either slice by hand or run through the fine cutter.

Cook for 2–3 minutes in plenty of salted water and give a quick rinse in cold water once cooked.


*Cook baking soda in a 120ºC oven for an hour.

Pork Cheek

Pork Cheek
Ginger
Garlic
Chilli flakes
Katsuobushi
Oyster sauce
Cider vinegar
Soy sauce
Water
Tamarind
Rice wine
Fennel
Red onion
Celery
Apple
Parsley
Star anise
Bay
  • Heat a heavy based oven proof dish over a medium high heat, brown the cheek all over.
  • Add the vegetables, large dice, and all the liquids & spices, add enough water to almost cover everything. Place on a lid and braise for 2.5 hours at 130ºC.
  • Cool, remove meat and refrigerate in a tight fitting container with some of the cooking liquid.
  • Strain the remaining cooking liquid and refrigerate, when cooled the fat will solidify on the top, use this to crisp up the sliced pork cheek.


Dashi
  • Put 3 Litres of water in a pot, add 4-5 six inch pieces of kombu to the pot, bring to the boil cover and turn off the heat, leave it for an hour. 
  • Add a packet of dried shiitake mushrooms, simmer for 30 minutes. 
  • Scoop off the mushrooms and put in a container, cover with soy sauce, cool and place in the fridge (soy pickled shiitake). 

  • Add a good portion of katsuobushi, about 1 cup heaped, simmer for about 30 minutes. 
  • Strain, cool and refrigerate until ready to use.

Soup base

Add a 50/50 mix of Dashi and pork cheek cooking liquid to a pot and bring to a simmer, adjust seasoning with vinegar, chilli flakes and salt.

13 minute egg

  • Bring a pot of water to 75°C, using a large volume of water will make maintaining a constant temperature easier. 
  • Place eggs into the water and cook for 13 minutes, don’t use eggs straight from the fridge. Transfer the eggs to an ice bath to cool. 
  • Reheat the eggs at 60°C for 10 minutes (run under the hot tap), or store in the fridge for up to 2 days. 
  • Crack around the fat end of the egg, remove the shell and pour the egg out.


Build the bowl
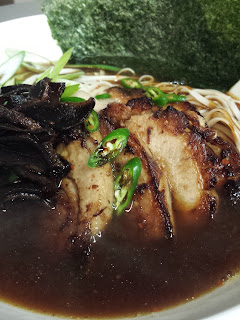
Add the cooked noodles to the bowl and lay on slices of the pork cheek, either sliced thinly cold or sliced thicker and grill to give it a nice caramelised side and warm through, pickled vegetables (ginger, daikon), soy pickled shiitake, chilli flakes or fresh slices, scallions, nori sheets and 13 minute eggs, up to you really. Gently pour over the soup base.

Wednesday, September 17, 2014

Cavatelli with beef


After completely busting my pasta machine, fingers and sense of humour when making alkaline noodles (recipe to come) for a nice tasty bowl of Ramen, I headed online looking to replace the cursed finger shredding hell beast, much to my pleasant surprise they are considerably less expensive than when I first purchased the pile of scrap metal. Ultimately I got completely distracted and ended up buying a Cavatelli machine from Amazon rather than one of the pasta machines from Trade Me, which I should really get around to sometime. Shipping speeds being rather good these days I didn’t have to wait long to get my hands on the machine and start playing. Ratios, recipes and advice is a little hard to find online if you’re not that interested in trying out non-ricotta cavatelli as I was, but after a bit of research, piles of books, and finding a curry cavatelli in Lucky Peach issue #1, I felt comfortable I had a decent basic cavatelli dough (not ricotta or egg pasta).


Little did I know that was just the start of the trouble shooting, making the dough is pretty straight forward, it’s a little like kneading a brick much like making alkaline noodle dough, but by the end it’s pretty pliable and easy to handle. The main cause consternation is getting the strips of dough the right thickness and width to run through the machine, they have to be wide enough to take up most of the roller, but not so wide than when compressed they get caught in the side, and has to be thick enough to be compressed when pulled through so it curls and makes a dense piece of pasta, too thin and it’ll just pass through and the texture is all off. Well I still have a lot of practice to get consistently good cavatelli, but I’m sure it’ll be one of those light-bulb moments when I nail the perfect thickness and width.


Cavatelli
1 Tbsp Olive oil
2 Cups Flour
1/2 cup Hot water
1 tsp Baking powder
Big pinch of salt

Add the flour, salt and baking powder to a bowl and make a well in the middle. Pour in the water and oil. Mix together, and form into a ball. Cover and let sit for 10 minutes to hydrate a bit.

Knead, it will be very stiff and a lot of hard work, after about 5 minutes wrap and let it rest for 30 minutes at room temperature.

Knead again for about 5 minutes, wrap it and refrigerate for at least 30 minutes.

Roll out and cut into strips ready to roll through the Cavatelli machine.

Once passed through you can freeze in a single layer (and then transfer to container) or cook straight away, in plenty of salted water boil for 4-5 minutes.

Braised Beef
This is a pretty versatile sauce, loosen it with a little of the pasta cooking water before tossing it through the cavatelli. Leftovers are great when reheated with some sautéed cavolo nero.

Stewing beef, cubed
Celeriac, diced
Carrot, diced
Onion, diced
Fennel bulb, diced
Chicken stock
Tomatoes
Bay leaves
Parsley, finely chopped
Mustard
Anchovies
Tabasco
Olive oil
Salt & pepper

Heat a decent glug of olive oil in an oven proof dish and brown the beef all over, add 4 or 5 anchovies, cook until they have melted into the oil. Toss in the onion and fennel, cook until translucent. Add the remaining ingredients, adding enough stock so the liquid is almost covering everything. Place on a lid and cook in a slow oven until falling about, about 130ºC for a few hours.

Spoon out about a third of the sauce, and as much meat as possible, pass the remaining sauce through a mouli, pull the meat apart with a fork, stir everything back together, taste and season.

Take enough sauce for the number of portions, I’m a nerd and usually do a portion at a time, if it needs reheating place in a pan on a medium heat, loosen with some pasta water and toss the cavatelli through the sauce, serve up. To add a little extra dress with a little lemon-chilli oil* and parsley.

*Lemon-chilli oil: 1 part peppery olive oil, 1 part lemon juice, chilli flakes, and salt.

Tuesday, September 9, 2014

Israeli couscous & smoked fish salad


There's something I love about making a salad, I think it's because I love prep work, chopping, dicing, getting everything in place. Also they are usually pretty forgiving, you can fix mistakes and the flavour pay-off is immediate so you know if a wrong turn has been made.

Israeli couscous cooked in savoury stock
Small fennel bulb, shaved and fronds picked off
Capers
Garlic clove, grated into the lemon juice to mellow
Cumin and chili toasted and ground
Smoked tarakihi (white flakey flesh)
Parsley, finely chopped
Hard boiled egg, passed through a course mouli
Habanero or Tabasco sauce
Lemon juice and rind
Olive oil
Smoked salt
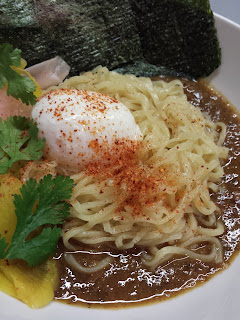
This is pretty much pure assembly once you have the easy prep done. Toss everything together, reserving some of the toasted spices, fish and herbs for garnish. Taste and adjust seasoning with salt and lemon juice. Make a nice pile of the salad on a plate and arrange some nice large flakes of fish around, scatter over the herbs, dust with the spices and add a couple of drops of the hot sauce for piquancy.

Sunday, August 31, 2014

chicken thigh roulade


Well as I usually do when I buy a chicken without the express purpose of roasting it, and sometimes even then, I break it down. If I'm roasting it I'll leave the breasts on the bone but disassemble the other parts, after all there are usually only 2 mouths to feed. Otherwise the breasts come off and separated for 2 meals, the wings off for stock or a quick snack, the thighs usually kept on with the drum and are a portion each, and then finally the carcass is set aside, usually in the freezer ready for stock. I usually view the whole procedure as practice, for what I'm not quite sure, but I have the process down, these days I can break-down, debone and skin a chicken quicker than you can say it.

As with most things repetition makes you look for a break in the usual, so with this latest chicken I broke it down pretty much as normal but took the skin off whole and deboned the thighs, I wanted to do a roulade, I knew I was going to stuff it with ricotta and hazelnuts, heck I knew that when I bought the ricotta well before I bought the chicken, I knew pretty much how I was going to cook it, sous vide for an hour at 65°C (fry it to crisp the skin after), but looking at what I had to work with I wasn't quite sure how it was going to happen. That was until I remembered a certain little package that was sitting hidden in the bottom of the freezer, probably past its usable date, a packet of transglutaminase, activa rm, or commonly named meat glue, I had been thinking of a reason to use it for quite some time but most everything seemed convoluted, not tonight though, I needed something to hold these disparate pieces together.

A trusty small sieve was loaded with the white powder, skin laid down on a sheet of cling film, a dusting of the powder, thigh meat arranged in an even layer—leaving an edge with some skin uncovered—another coating of the powder, the filling shaped down the middle, the edge bought up and rolled tightly with the cling film, using a skewer, holes poked to release air bubbles, another layer of cling film down and used to roll it tighter, holes poked again, another layer rolled tighter, the ends rolled in opposite directions (like a Candy wrapper) tied with string and left to set in the fridge overnight.

The inside of the roulade was seasoned with smoked salt and pepper and the stuffing was made by equal volumes (by eye) of hazelnuts blitzed in the blender and ricotta (with salt and parsley).


Well most of the hard work done, the next day a large pot of water is heated to slightly higher than 65°C and the wrapped chicken removed from the fridge. A few more holes are pierced through the cling film to get rid of any pesky air pockets and the chicken is wrapped tightly again and tied to form a watertight seal. The wrapped chicken is placed in the water bath for about an hour or until the internal temperature reaches 65°C, remove the chicken from the water and carefully unwrap, use a clean tea towel to carefully dry the outside of the roulade, I find rolling it up in the towel to rest while I prep the rest worked best.


Heat about a centimeter of olive oil in a heavy based pan and get it to frying temperature, carefully brown the roulade all over, it will spit like crazy so be careful not to burn yourself. When fully browned place on some paper towels and cover, leave to rest while you sauté some cavolo nero.

Slice the roulade and serve on a bed of the sautéed greens.

Monday, August 25, 2014

Beetroot Relish


As I was rather enthusiastic about the beet greens at the market I ended up with an abundance of baby beets and there are only so many roasted beets one can endure. So with a glut (16 golf ball sized beets) left in the fridge and really not wanting anything to go to waste a canning plan was made. This is pretty much a what do I have in my vegetable draw that needs using and is going to work well together plan. I got a large jar into a 100°C oven to sterilize whilst I prepared the relish.


Get a pot on to a medium heat and add 1 cup of cider vinegar and 1 cup of soft brown sugar. To this add a couple of whole dried chillies, a few allspice berries and grate in a decent thumb of ginger. Bring this to a simmer so the sugar can dissolve. Next grate an apple, granny smith, a medium sized fennel bulb and all of the beets. Add the vegetables to the pot and season with a bit of salt, cover and simmer for about 20–30 minutes, taste and adjust the seasoning. I don't like too much loose liquid, and the beets should be cooked and tender not mushy, so keep it simmering until there's only a small amount of thick syrup left loose, about another 20 minutes. Pour the hot mixture into the sterilised jar and do the lid up tightly, let it cool before storing in the fridge, it should keep for a couple of months, if it lasts that long.

Thursday, August 21, 2014

Red rice salad


I must admit I don’t get to the Sunday markets as often as I’d like, maybe it’s living all the way in the back end of Karori, or just pure and simple laziness, but quite often best laid plans end up being a coffee and eggs on the couch, or if it’s a sunny day, the couch, who am I kidding! When I do manage to drag myself and better half out of the house at a halfway decent hour to hit the markets I always vow I must come every week and proclaim about how much we’re missing out on, which is completely and utterly true. Well we managed it last Sunday, and I managed to latch on to possibly one of my favourite greens, beet tops, unfortunately almost never seen on a supermarket vegetable shelf, well not in good nick anyway. Sautéed and mixed with ricotta and hazelnuts, they make a great ravioli filling, or as below a great addition to a salad.


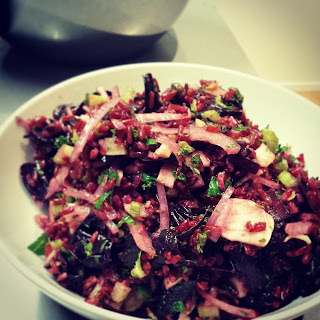
Red Rice Salad
1 cup red rice
½ cup hazelnuts
capers (in salt)
1 fennel bulb
1 red onion
1 large purple carrot
1 celery stalk
1 large bunch of beet greens
1 clove of garlic
Handful of parsley and celery greens

Place the rice in a pot and pour in 3 cups of water, bring to a boil, put on a lid, reduce to a simmer and cook for about 30 minutes. Strain and toss in some good oil (olive or hazelnut), season with a salt, mustard and cider vinegar. I like to dress the rice now so I know the base is well seasoned and will only need tweaking at the end.


Get a pan on a medium high heat, slice up the beet greens, crush the garlic. Heat a dash of oil in the pan, sauté the garlic but don’t brown, toss in the beet greens and cover. Cook until tender. Toss the greens through the rice.

The rest is pretty straight forward. Roughly chop the hazelnuts and toast in a dry pan. Slice and dice the fennel, onion and celery. Soak the capers. Either grate or use a mandolin on the carrot. Finely chop the parsley and celery greens.

Toss all the ingredients together, taste and season with salt (smoked salt is really good with these earthy flavours), adjust the acid with some cider vinegar, and a little heat doesn’t go amiss add a dash of hot sauce if you like.

Wednesday, August 6, 2014

Sprouts, mayonnaise & chicken


Get sprouting! Well I have been anyway, I’ve been getting into salads, especially heavy on the celery, greens and all, using ingredients I haven’t really thought of using before, like whero peas, wheatberries and quinoa, but most of all I’ve really been digging the humble sprout. The thing about the sprout is you have to have a little forethought or a production line set up as quite frankly they are ridiculously overpriced to buy pre-sprouted. On a positive note, sprouting is easy as pie.

Place quarter of a cup of mung, puy lentils or whero peas in a clean glass jar, rinse and drain a couple of times and then fill up with water, cover with a tea towel and leave overnight. The next morning, drain off the liquid, give the jar a jostle so the seeds aren’t languishing in a pool of water. Repeat the rinse and drain for 3-5 days until the sprouts have got enough sprout for you, 2 days is usually enough for a nice short sprout, but I wouldn’t leave it longer than 5. They’ll keep covered in the vegetable crisper for a couple of days.

I was going to assume that you know how to make mayonnaise before I got into the coleslaw, but I figure I should give it a quick once over. This method is for a stick blender. Use a jar that is just big enough to fit your blender, it’s preferable that the opening is smaller in width than the body of the jar. Add one egg yolk to the jar along with a dash of cider vinegar and a teaspoon of Dijon mustard. Start running the blender and slowly drip in some neutral oil, I use a mix of olive and canola(rapeseed), when the emulsion has formed you can start pouring in the oil more liberally, for a lighter mayonnaise you can alternate between oil and water, you should be able to get about 50% water content. Taste and season with salt and vinegar. If the mayonnaise doesn’t thicken try adding more oil or another yolk, if the emulsion breaks or doesn't form, pour the mix into a jug and in the jar add an extra egg yolk and slowly blitz in the broken mayonnaise. It should keep in the fridge for a couple of months.


Anyway back on track to the slaw, take a couple of tablespoons of mayonnaise and mix in a crushed clove of garlic, let it sit in the fridge a while so the garlic can mellow a bit. Thinly slice a fennel bulb and red onion, on a heavy bias slice some celery and its leaves, slice the larger green leaves thinly and just roughly tear the smaller yellow ones. Toss it all together in a bowl with some sprouts, crushed pumpkin seeds, smoked salt and the garlic laced mayonnaise.


An ideal match to the crisp cool slaw is a hot and spicy chicken wing, or in this case drumstick, I've covered hot wings so many times on here it's not funny but this time it's my oven "fried" chicken drumsticks. You end up with a crusty crisp coating and fall apart moist flesh below. In a large bowl add a good few tablespoons of tapioca starch, you can get this from a good Asian supermarket or here in New Zealand pick up arrowroot from the baking section of the supermarket, it's not arrowroot but just tapioca starch, mix in a sprinkling of salt, smoked paprika, hot chilli powder/flakes, spice it up as hot or mild as you like, and coriander powder. Toss the drumsticks in the mix to coat and place on a plate, cover and refrigerate overnight. When you're ready to cook, preheat the oven to 220°C, prepare another mix of tapioca starch and spices, toss the drumsticks in the powder to coat, arrange on a baking tray and cook for 30–45 minutes turning twice. If you really want to go for extra lush drumsticks melt some butter with hot sauce and crushed garlic and when the chicken is fresh out of the oven toss in the butter sauce, you won't regret it but your hips might.